Preparing for Transfer
This page outlines the steps to take before transferring media objects.
- Locating and verifying carriers against SPEC records
- Removing non-digital archives carriers
- Commercial software
- AMI (addressed in completing transfer)
- Choosing transfer methods
- Setting up space to store files on RAID
Locating Carriers
- Carriers are located on shelving by the entrance door
- Carriers to be transferred are likely on
02.**shelves
Before a media object can be imaged it first must be recorded SPEC.
Verifying SPEC records
An acquisition record should exist in SPEC and SPEC object records should exist
for each carrier being transferred.
Verifying acquisition record exists in SPEC
- Use the Filemaker Pro desktop app or or web app to access SPEC
- Log in with your credentials
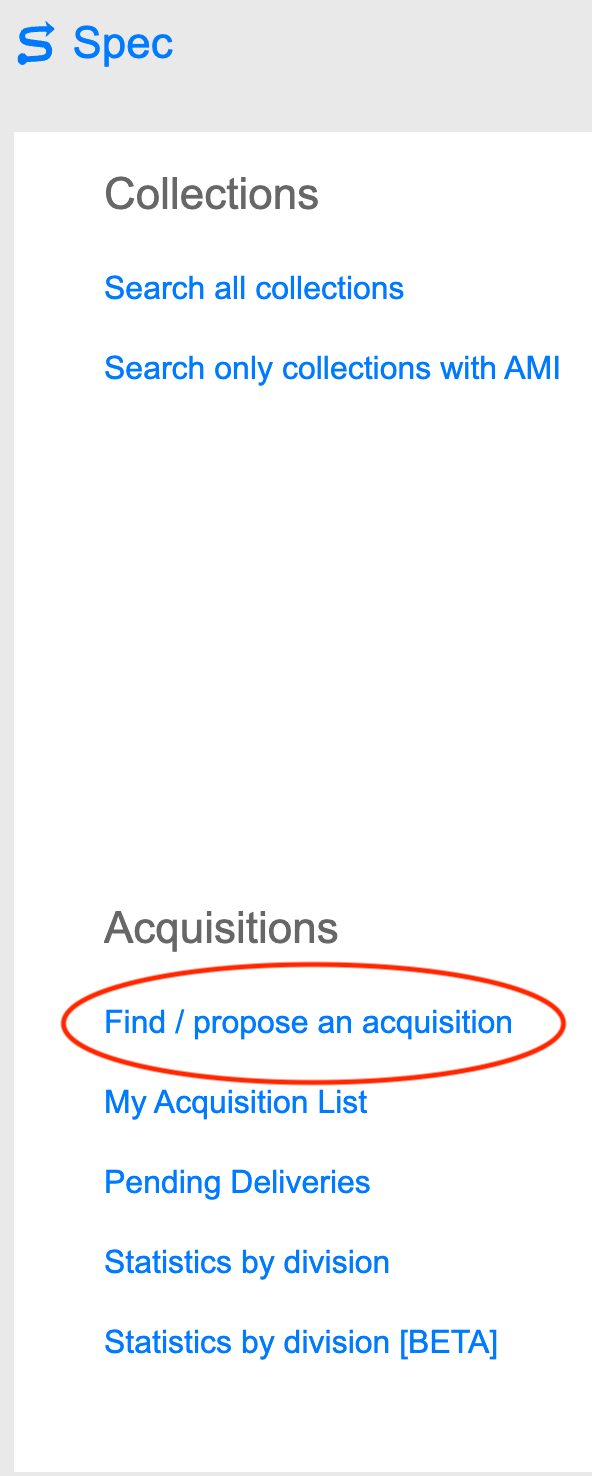
- Navigate to the bottom left of the screen
- Select Find/propose an acquisition under Acquisitions heading
Select to view image
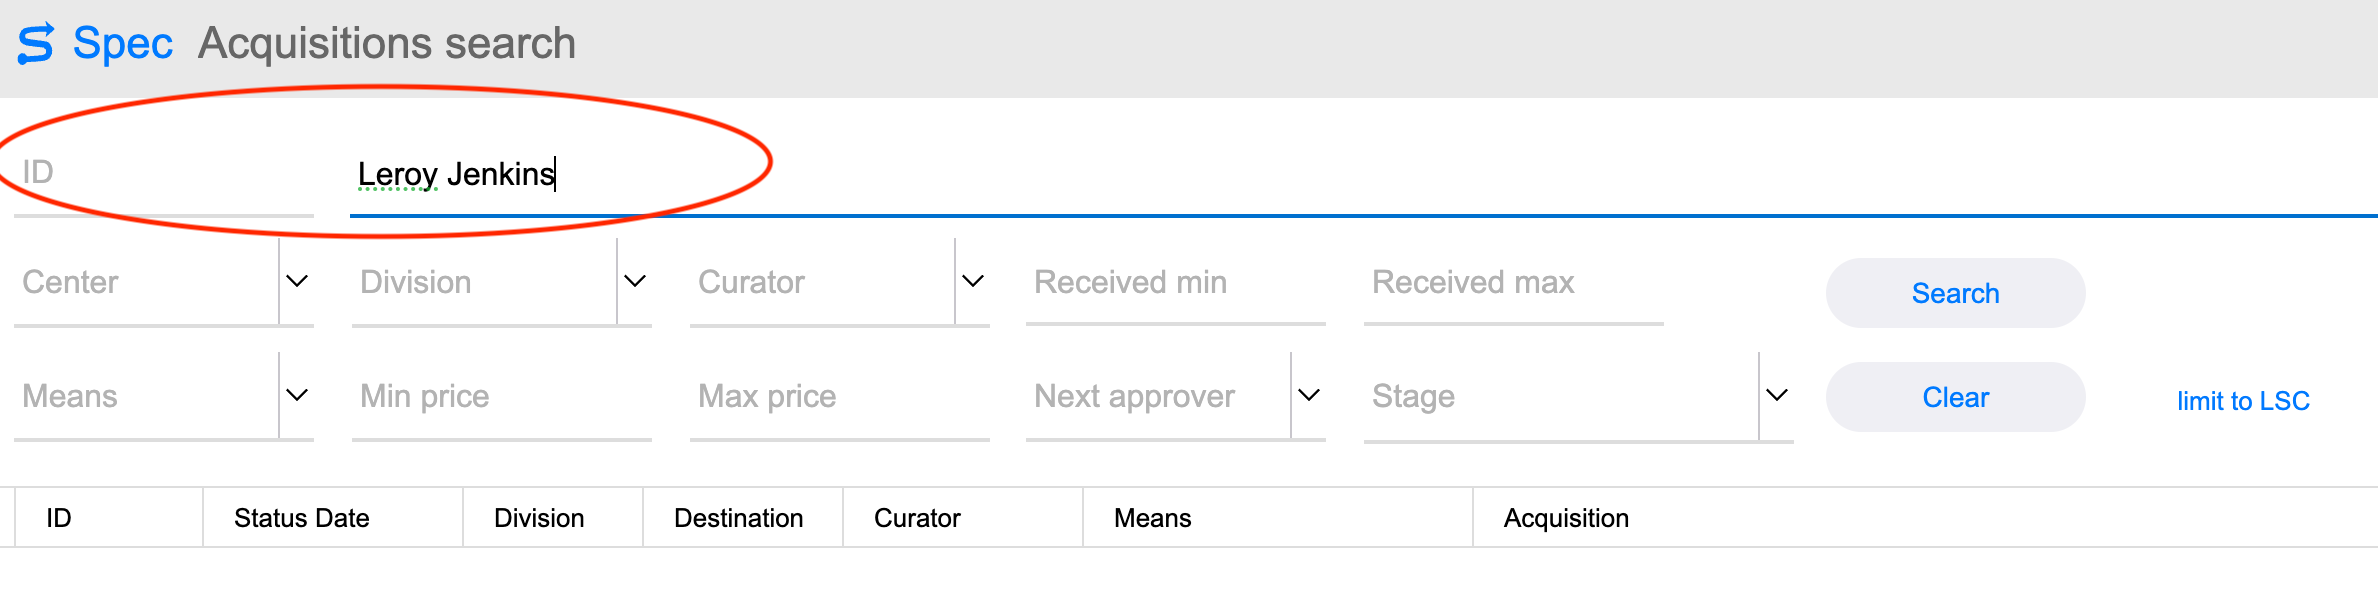
- Enter acquisition number in the ID field or name in the Acquisition field
Select to view image
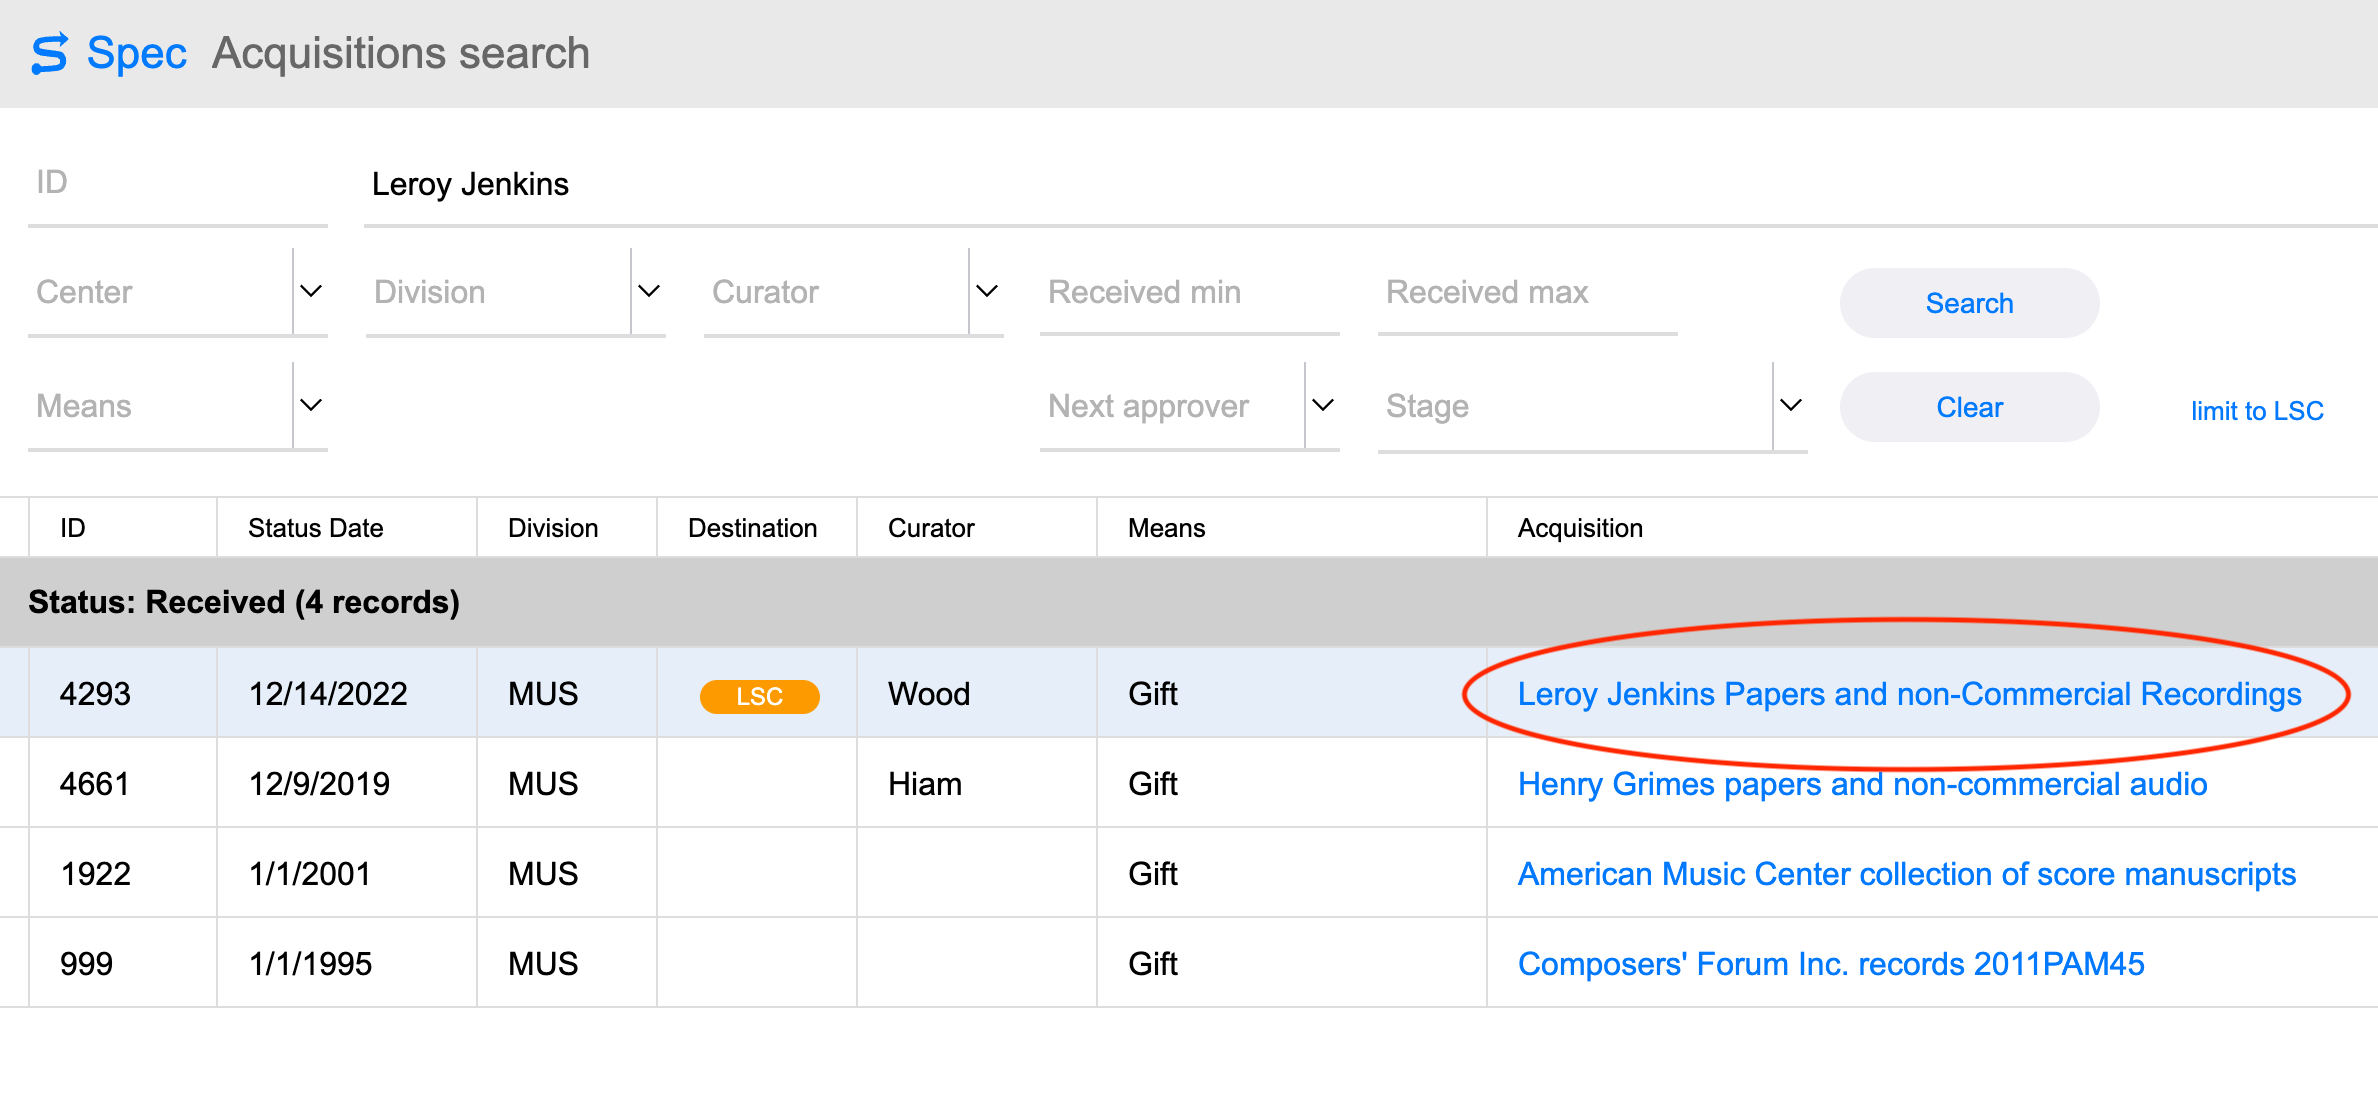
- Select search
Contact Collection Management if you cannot find the acquisition
Verifying object records exist in SPEC
- Select the acquisition from the list
Select to view image
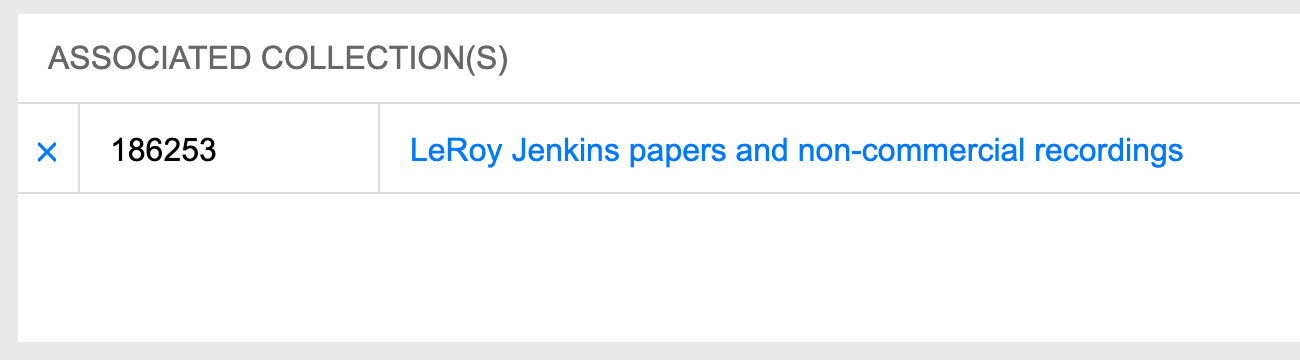
- Note if there are any associated collections
Select to view image
- Navigate to the left side of the screen
- Note the number of items listed for Digital media under Extent Summary
Select to view image

-
Select format summary next to Extent Summary, the right most button
-
Select digital media, mouseover text reads go to object records
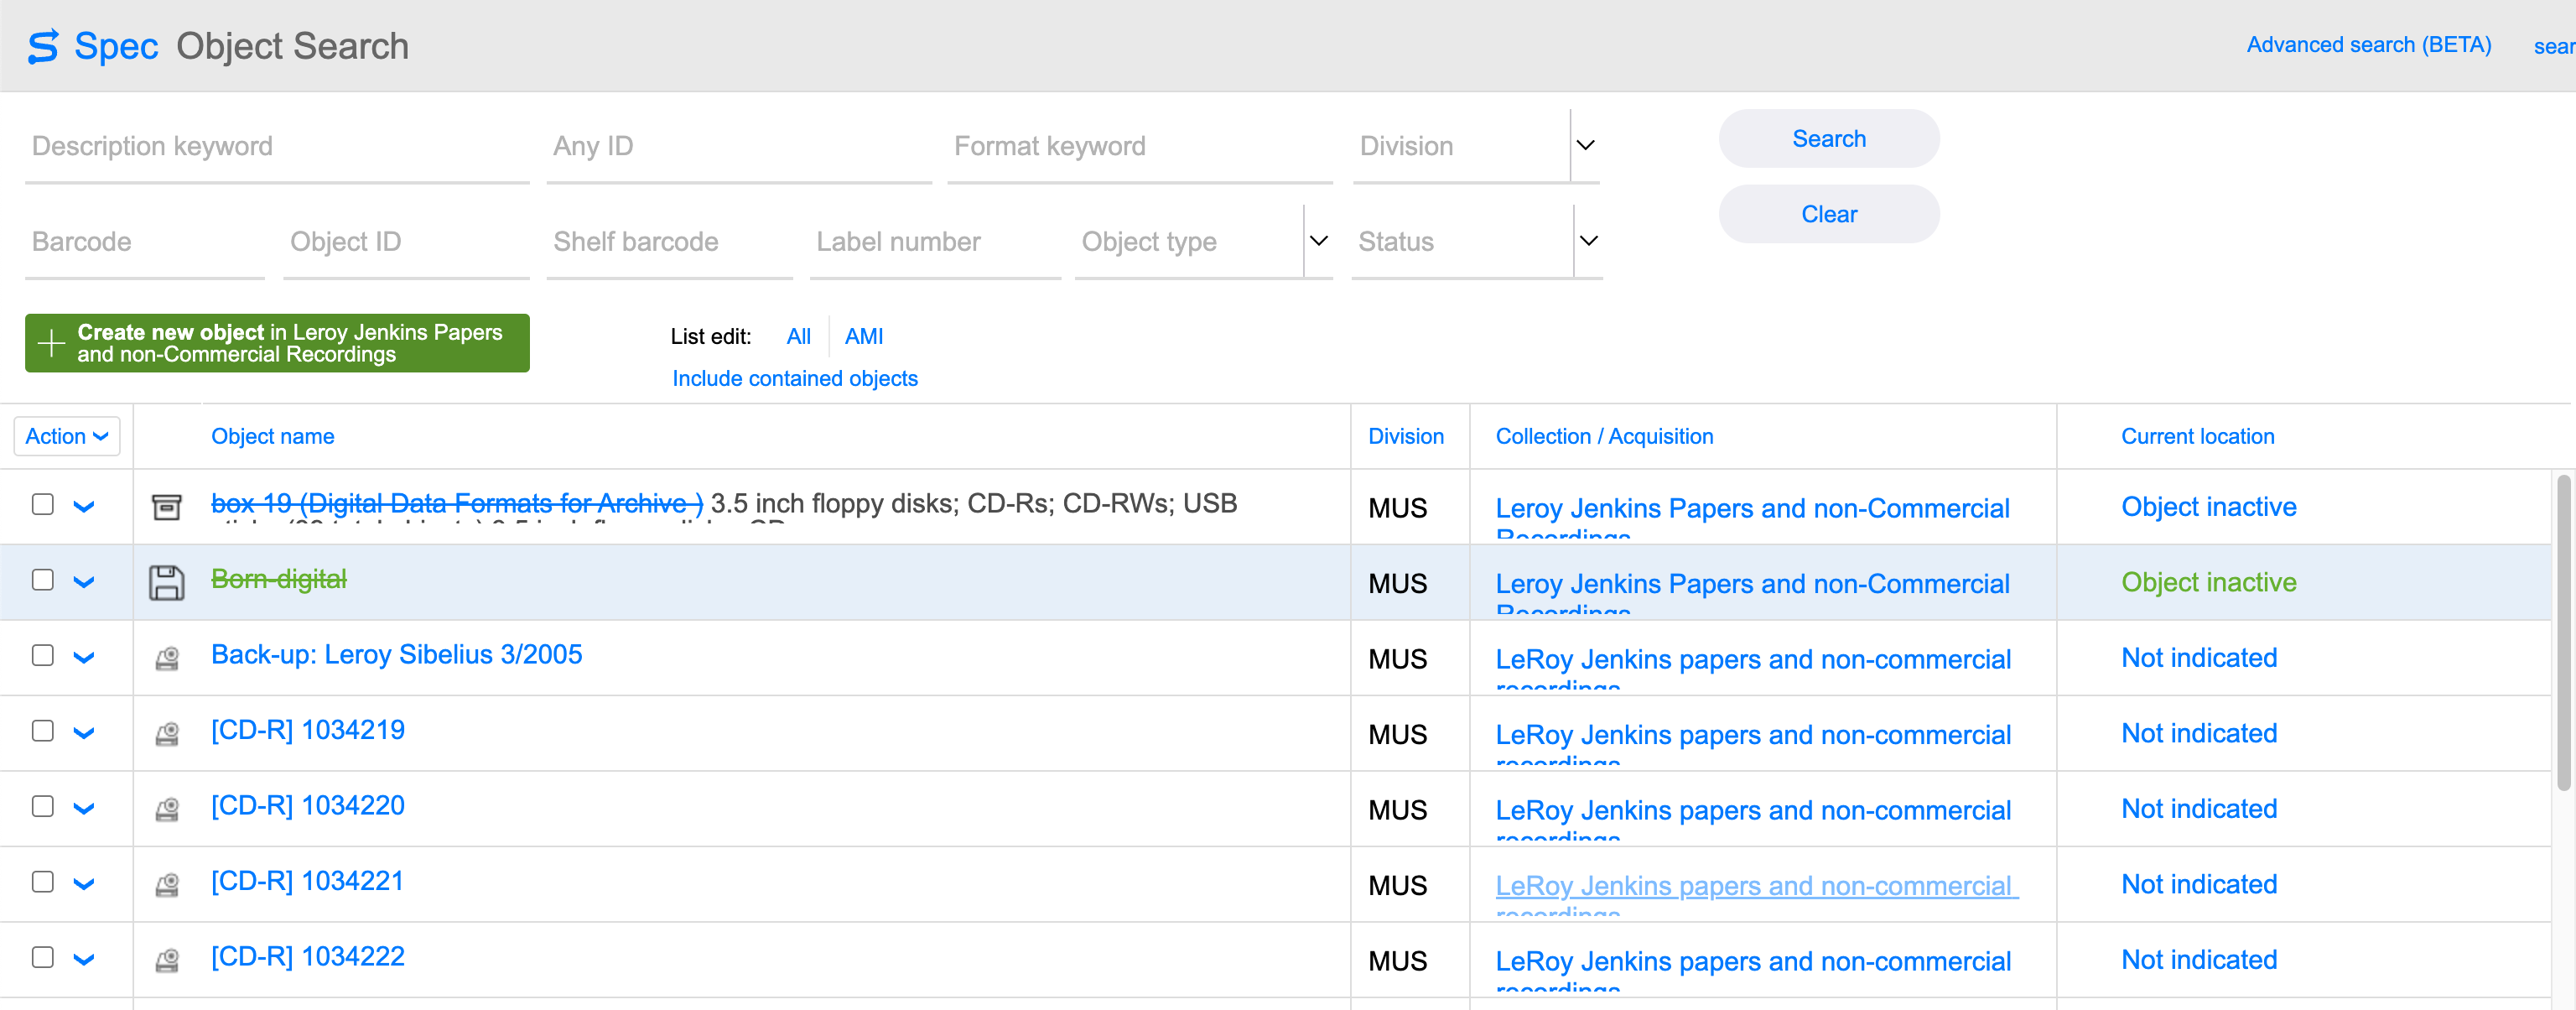
Select to view image
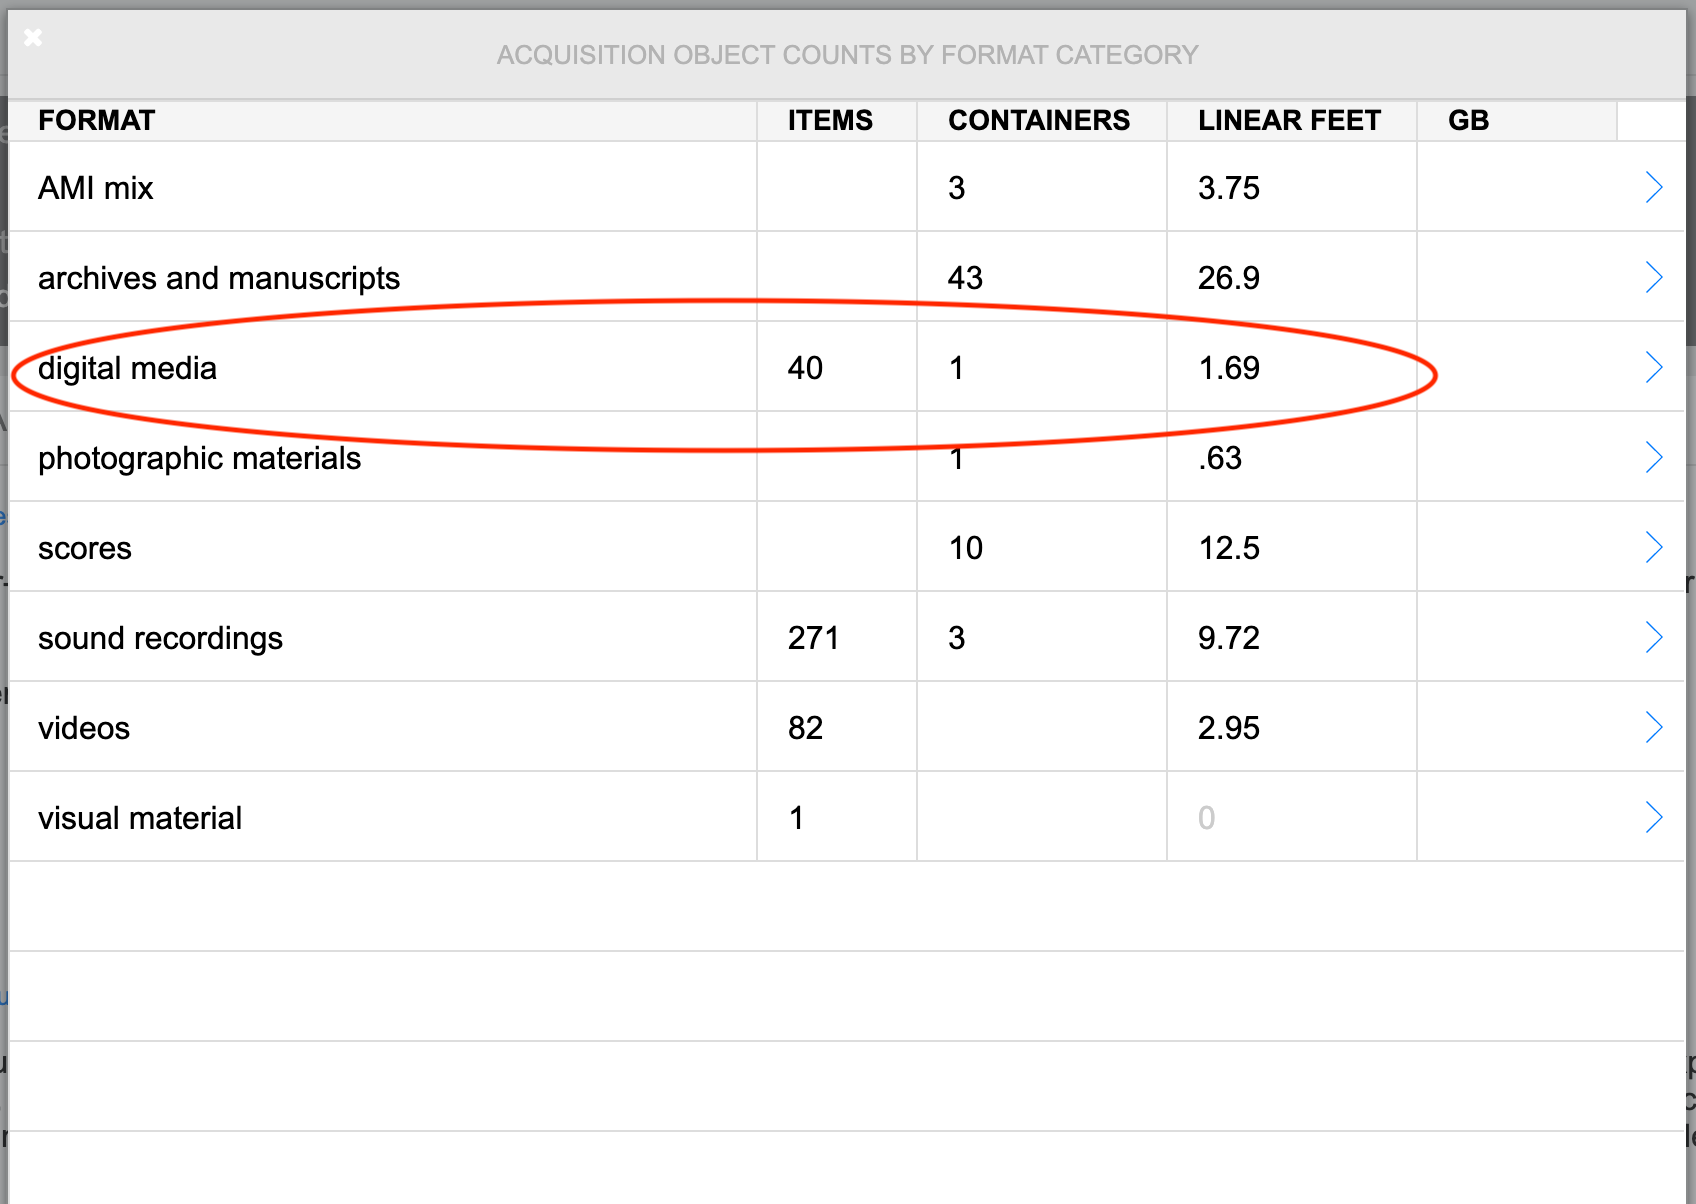
- Confirm the number of carriers Digital Archives has match the object records
Select to view image
- Confirm the number of items listed for Digital media matches the object records
- Report mismatch of digital media summary and object records to Systems and Operations
Contact Collection Management if the number of carriers and records don’t match
Verifying additional carriers from Archival Processing
When archivists survey a collection they may find additional carriers in boxes.
Archivists should create object records for any carriers they find and notify
Digital Archives of their discovery.
- Verify objects records exist in SPEC
Contact the processing archivist if the number of carriers and records don’t match
Handling Commercial Software
These instructions are for Digital Preservation staff (including fellows) only.
- Label commercial software with a simple acquisition name.
Crouchfor Stanley Crouch papers.
- Image commercial software only when specifically instructed to do so.
- Commercial software media don’t receive objects records.
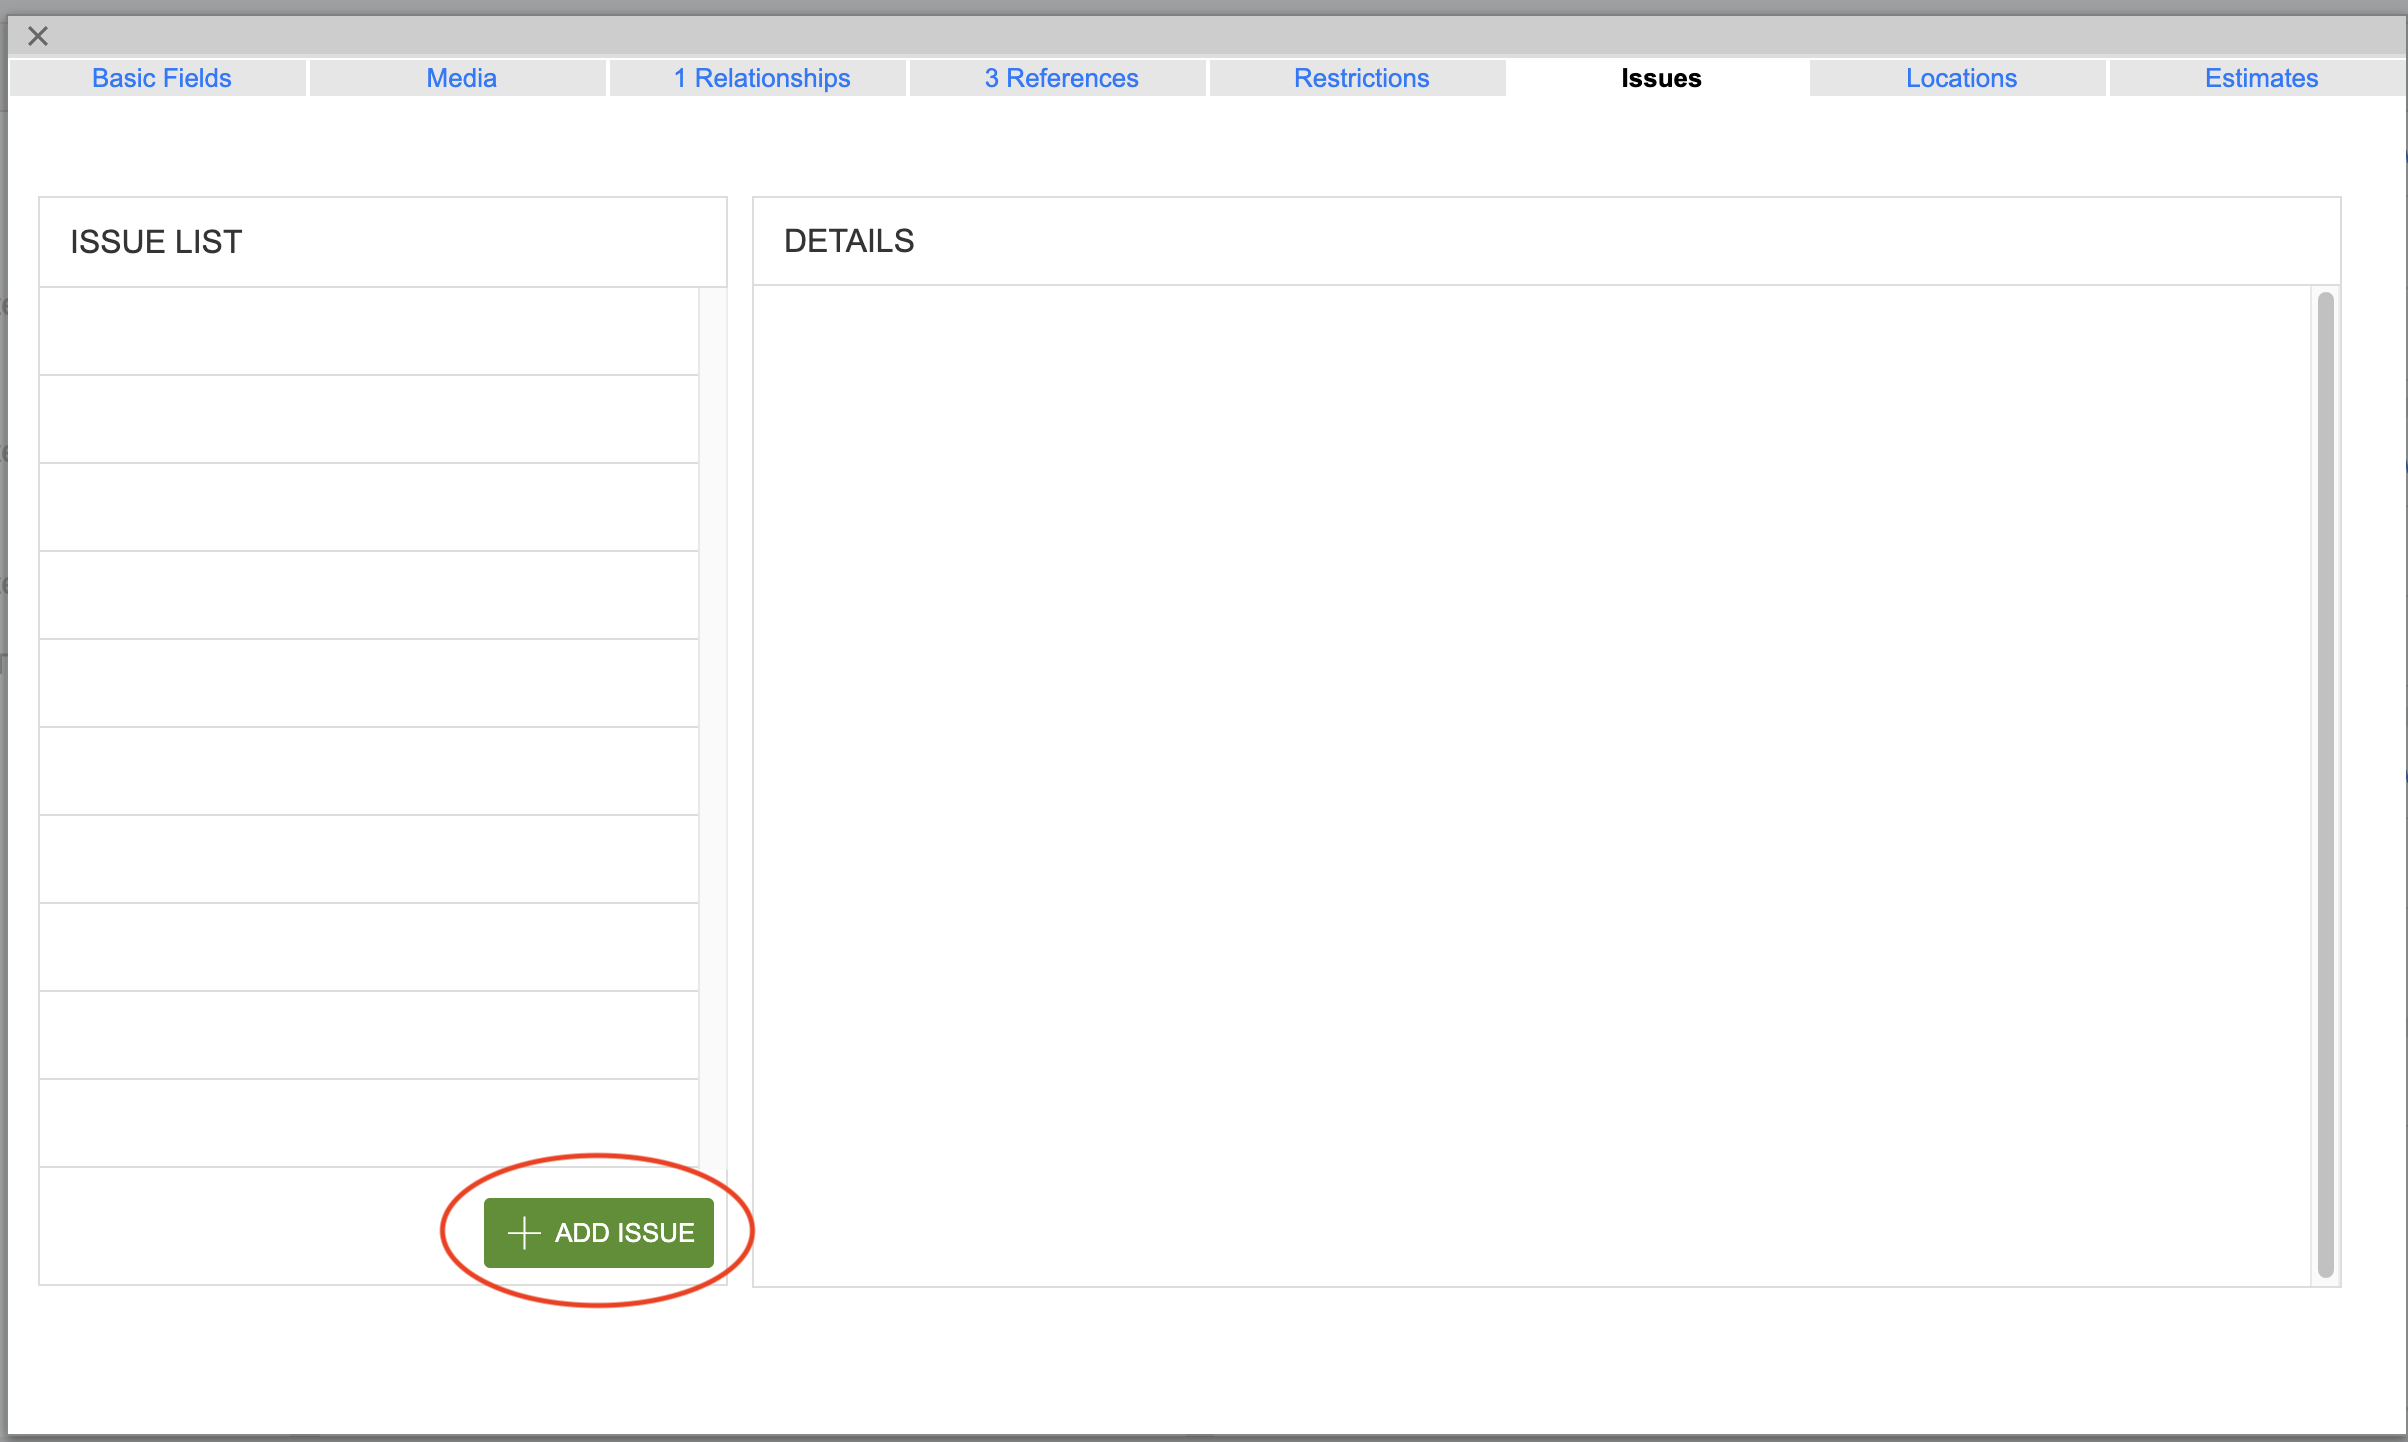
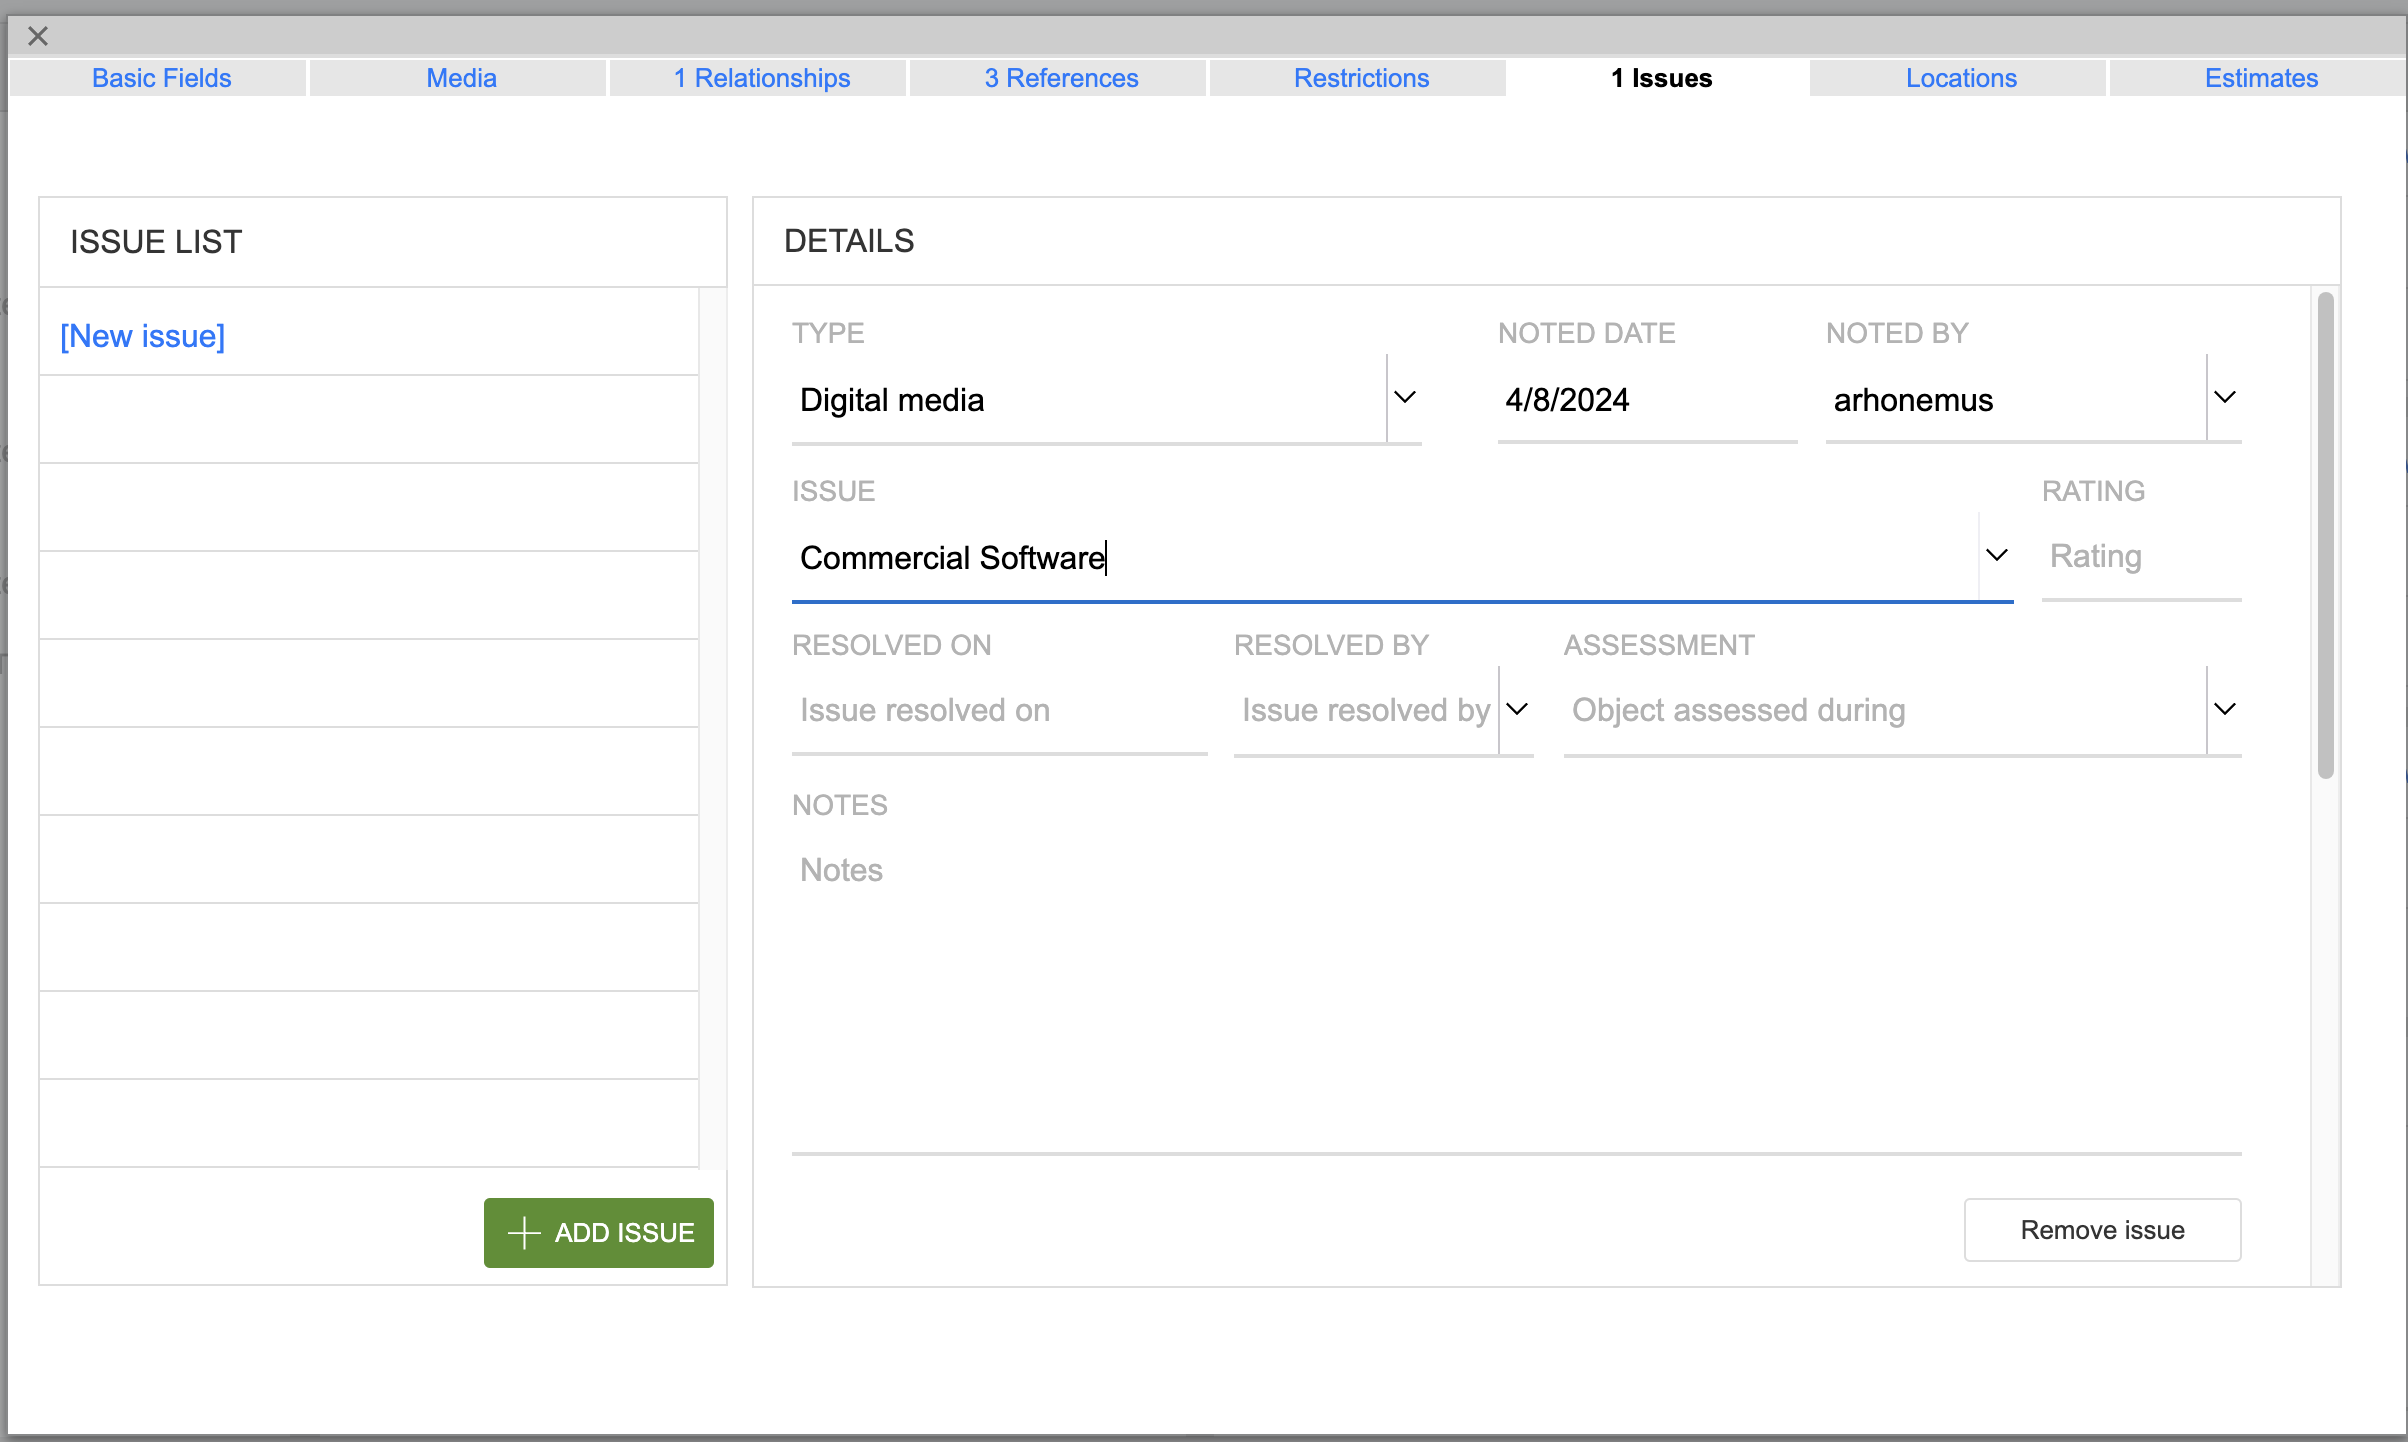
When objects records were created for commercial software create an issue.
- Select issues from the object record menu in SPEC
Select to view image

- Select Add Issue
Select to view image
- Select Type: Digital Media
- Enter Issue: Commercial Software
Select to view image
Choosing Transfer Methods
File transfer is the most common method of migrating files to more stable storage.
Disk imaging is done when an image is required to access files, usually for emulation
of legacy file types.
File transfer methods include:
- Rsync
- Bagit
- Mass Optical Disc File Transfer with Nimbie (creates bags and other transfer metadata)
- Cloud Transfer - Rclone
- FTK Imager File Export
- IsoBuster File Export
Disk Imaging methods include:
- Kryoflux Imaging
- FTK Imager
- dd
Choosing Transfer Method by Carrier
Digital Archives has a standard transfer method for most of the carrier types we
encounter. Generally, carriers will be transferred with the standard method unless
standard methods fail.
| Carrier | Transfer |
|---|---|
| External Hard Drive | File Transfer |
| Internal Hard Drive | File Transfer |
| Thumb Drive | File Transfer |
| SD Card | File Transfer |
| Optical Media | Mass Optical Disc Transfer |
| Floppy Disk | Floppy Disk Imaging - Kryoflux |
| Iomega Disk | Iomega Disk Imaging - FTK Imager |
| Google Drive | Cloud File Transfer - Rclone |
Verifying Storage Space
Before beginning transfer make sure Digital Archives Diskstation (DADS) has enough
space to store the transfers.
Working with WSL on Windows
Most work Digital Archives work is done on mac os machines. When working on Windows workstations WSL (Windows Subsystem for Linux) is used instead of Terminal. Storage locations may need to be mounted. To mount or re-mount a storage location:
- Start WSL (Windows Subsystem for Linux) by searching for Ubuntu or selecting the Ubuntu icon on the Windows task bar.
Note: If you search for WSL you may come across the WSL app with a penguin icon, this is an older version of WSL and NOT the version currently used by Digital Archives
-
On opening the WSL terminal navigate to the mount point directory by entering
cd /mnt - Any mounted drives, such as those you are transferring between, should be accessible from the mount point directory. Drives you’ll see in /mnt include:
- d - Sata Drive Bay
- f - Storage for FTK
- h - Open FTK cases
- i - Codemeter access key
- y - DigArchDiskStation
- If you do not see the Y:\ drive in /mnt or /mnt/y appears to be empty then it must be re-mounted by:
- Changing to the top level directory by entering
cd / - Entering the command
sudo mount -t drvfs Y: /mnt/y
- Changing to the top level directory by entering
- Note: For a visual example of mounting a drive in WSL reference the following recording:
Creating Destination Directory Batches
While most transfer and imaging workflows use scripts that will create destination packages, there may be times when manually creating destination packages is needed. To manually create batches of destination directory packages:
-
Open Terminal on Mac OS or WSL on Winodws
- Navigate to the destination for file transfers or disk images.
- Using fileTransfers as an example enter
$ cd /Volumes/DigArchDiskStation/Staging/ingest/fileTransfers
- Using fileTransfers as an example enter
- Enter
mkdircommand.mkdir -p ACQ_acqID/ACQ_acqID_{start..end}/{metadata,objects}