Front Matter
This section explains how to fill out the fields of the finding aid front matter in the collection’s resource record.
Table of Contents
Resource Dates
For collections, provide dates according to DACS 2.4. If the use of a bulk date is appropriate for the collection, provide the bulk date in a separate date sub-form with the Type of bulk.\
For more information on the fields in the Dates subform, see Archival Object Dates section of this guide.
Using the Date Calculator
ArchivesSpaces provides a date calculator, which will automatically find the earliest and latest dates in a collection and create a Date record for them. The Date Calculator will find the dates of each component under the current record, compare to find the earliest and latest dates, and generate a Date record using the range provided. Note that the Date Calculator will not provide information on bulk dates - it will only provide the total span for the record.The Date Calculator can be accessed under the More menu from the Resource and Archival Object screen.
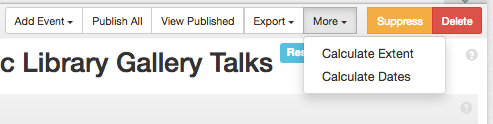
Selecting Calculate Dates will open the Date Calculator, which will ask for which type of date to find. Since all dates in a collection are set to Creation by default, this can be left as-is. Select Calculate Date Record to begin finding the date spans.
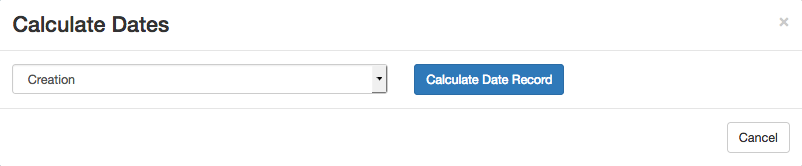
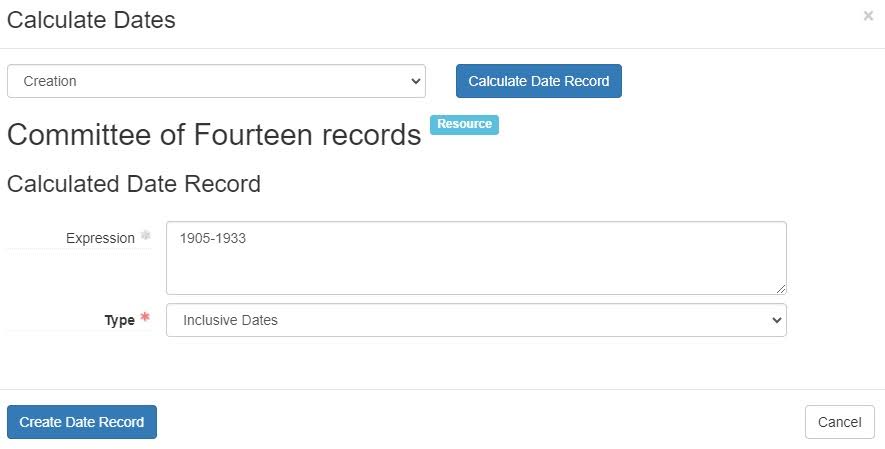
Doing so will begin the date calculation process. For larger collections, this may take some time. Once the calculator has finished, it will provide a Date form with the calculated date span provided.
Selecting Create Date Record will save the Date form to the Resource/Archival Object that the Calculator was opened from. If you edit the finding aid after calculating the dates, you will need to re-calculate the dates to include the edits. The form does not automatically update.
Extents
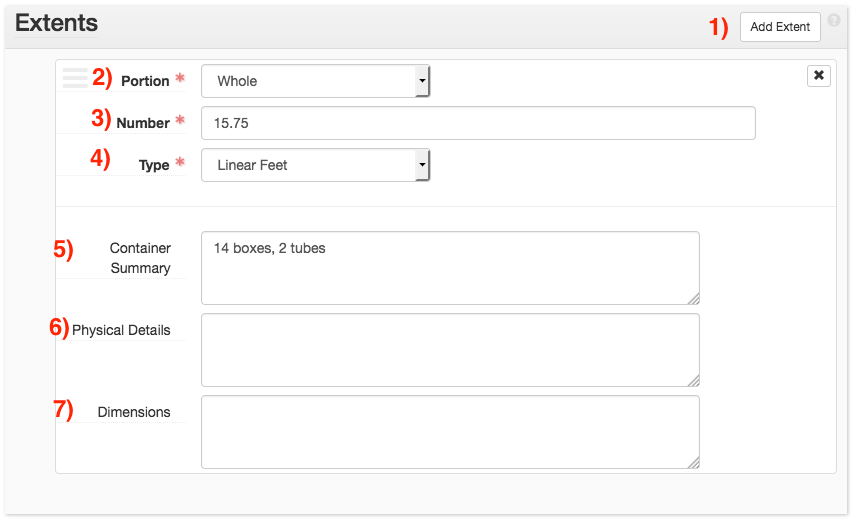
The physical coverage of a collection is described using the Extents sub-form. Much like dates, ArchivesSpace describes each aspect of the extent in separate sub-forms. For example, the extent of paper materials (i.e., boxes and linear feet) should be separate from the extent of the electronic records (i.e., files and bytes). To add a new extent sub-form, click on the Add Extent button (button 1).
Describe the relationship of the described extent to the entirety of the collection/component using the Portion menu (field 2). If the extent described encompasses the entirety of the collection/component (for example, the collection consists only of papers in boxes), select Whole. If the material described only partially encompasses the collection/component (for example, the collection consists of physical boxes, electronic records, and audio and moving image material), select Part.
Provide the number of the extent in the Number field (field 3). Provide the type of the extent in the Type field (field 4). For example, a collection spanning 58.83 linear feet would have a Number of “58.83” and a Type of “linear feet.” If the extent is describing electronic records, provide the size in bytes as the Number and the unit (kilobytes, megabytes, gigabytes, etc.) in the Type.
Provide the container description for collections in the Container Summary field (field 5). If a collection includes electronic records, provide the number of files in Container Summary.
Do not use Physical Details or Dimensions (Fields 6 and 7) unless otherwise appropriate.
Guidelines for Collection Extent
When providing extent metadata for resource records, follow these guidelines for data entry:
1. Provide the linear footage of the collection using the Number field, with a Type of “linear feet” and a Portion of “whole.”
2. Describe the container breakdown of the collection under Container Summary (e.g. “27 boxes, 6 volumes, 1 oversize folder.) Do not include AMI or electronic records.
Describe any non-boxed material, such as AMI and electronic records, in a separate Extent sub-form. Provide a Portion of “Part” (unless this encompasses the entire collection.) For electronic records, use the rules as established above.
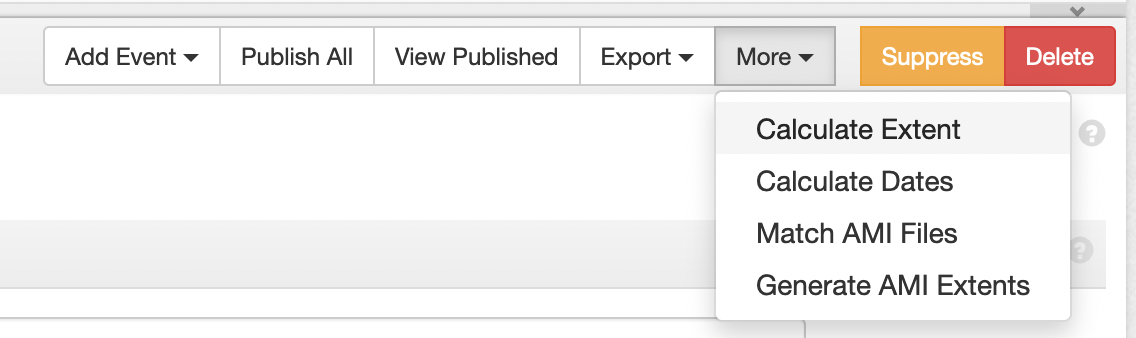
Using the Extent Calculator
ArchivesSpace provides a built-in Extent Calculator, which will automatically provide the linear footage and number of items in a given collection/series. The Extent Calculator can be accessed by clicking on the Calculate Extent option under the More menu at the top of the data entry screen for each collection/component.
Once opened, the Extent Calculator will provide a list of all Container Types under the current record, the total number of each type, and their sum linear footage. If the Extent Calculator is opened for a collection, it will provide information on all containers in the collection. If it is opened for a component, it will provide the sums only for the containers within and under the current component (e.g. all containers in a single series).
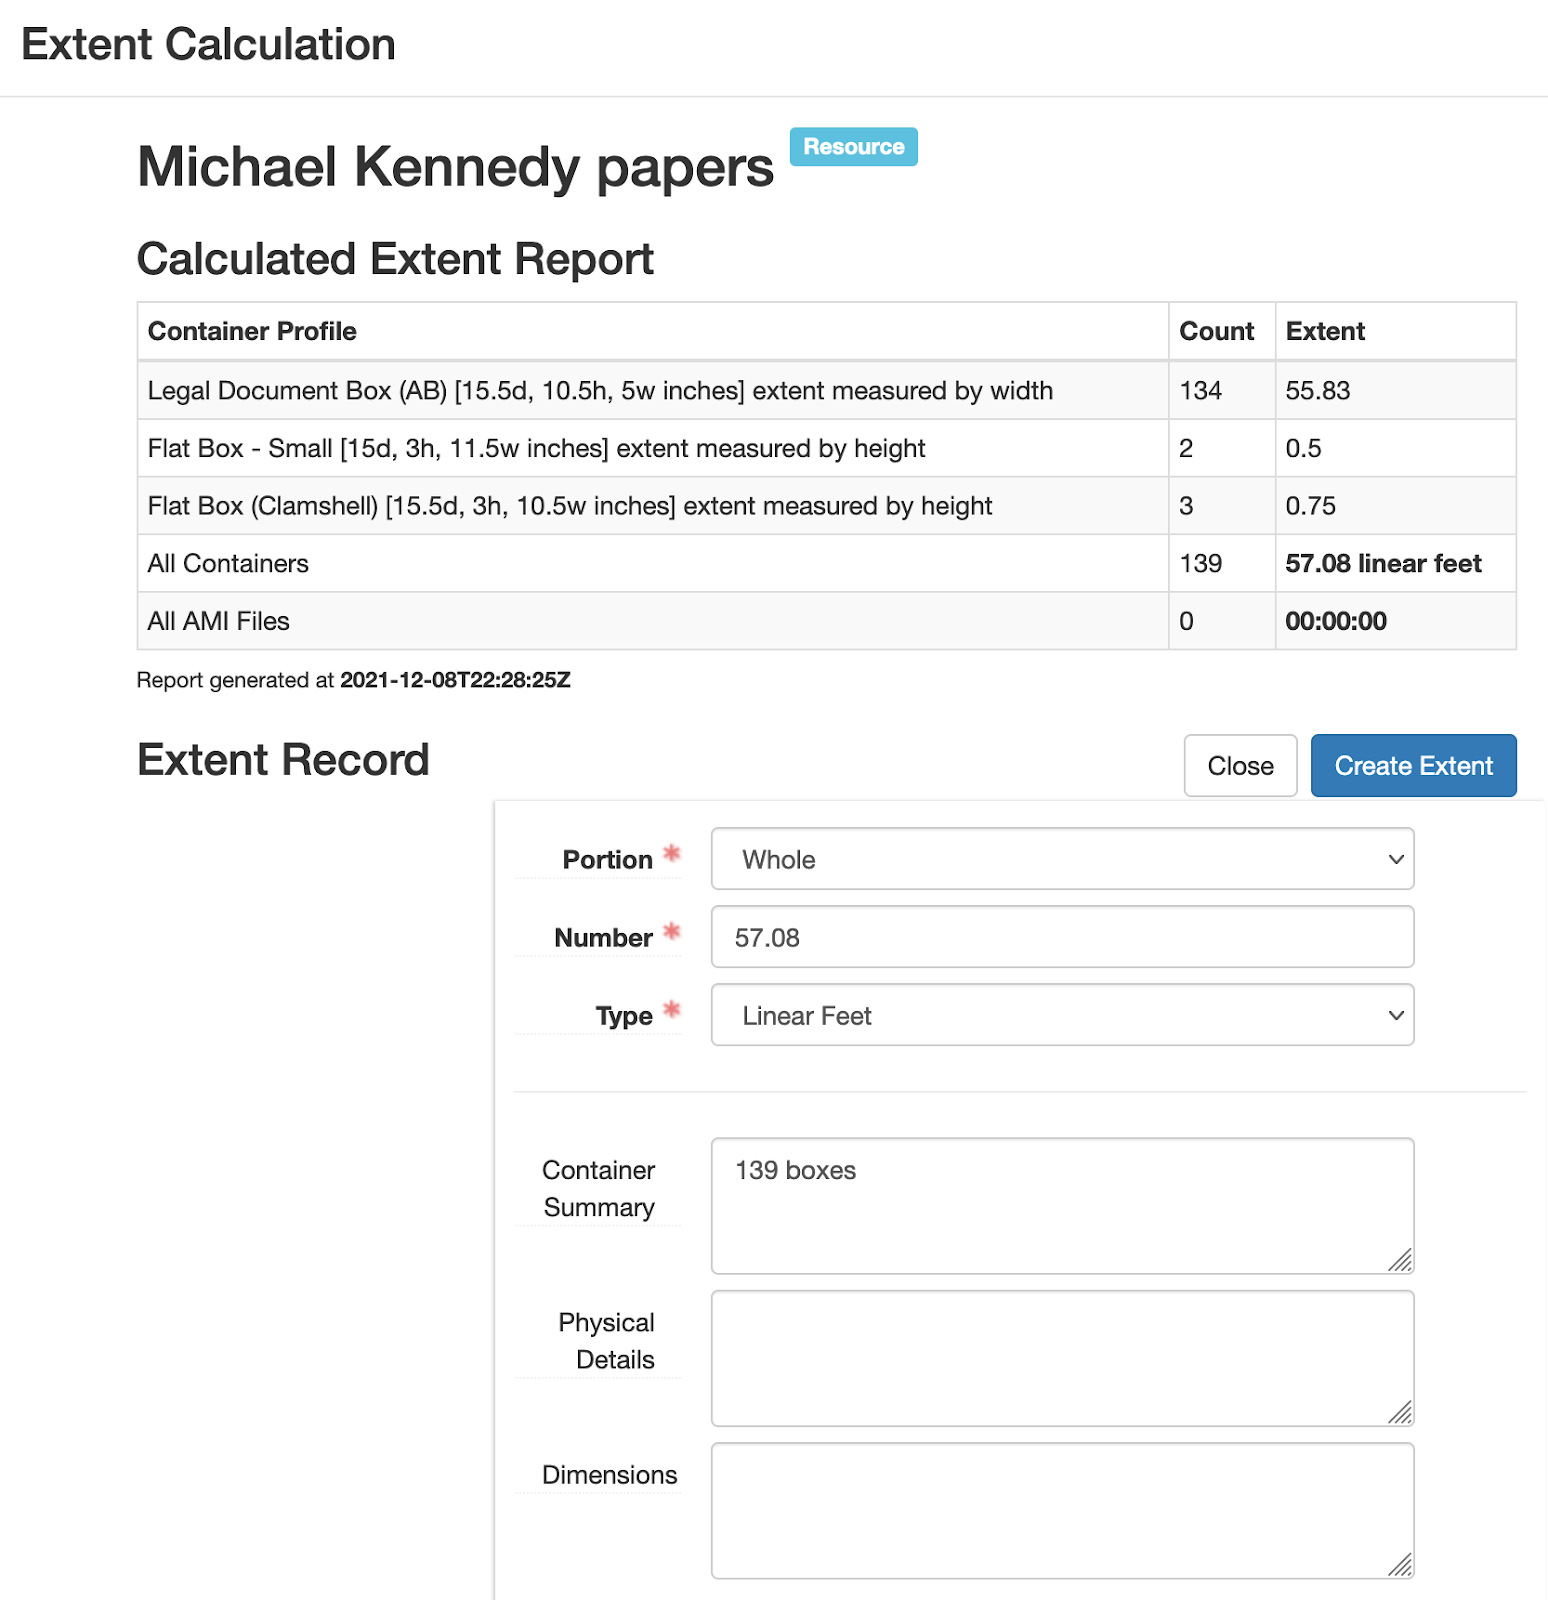
Clicking on Create Extent will save the Extent Record to the current record. Note that, while the Container Summary may not follow local standards, this can be edited from within the Extent Calculator before saving.
Note that Portal containers (Portal Box, Portal Tube, etc.) have no linear footage. These container types will need to be updated before using the Extent Calculator. If you are processing additions to a collection that was imported from the Archives Portal, the Extent Calculator may not provide accurate linear footage.
Electronic record extents will be calculated along with physical records. Note that electronic record extents use decimal orders of magnitude (i.e. 1000-byte kilobytes) instead of binary.
AMI extents are calculated using a SQL query of the database. The Senior Manager or Manager of Archival Processing can calculate these extents for you.
Finding Aid Data
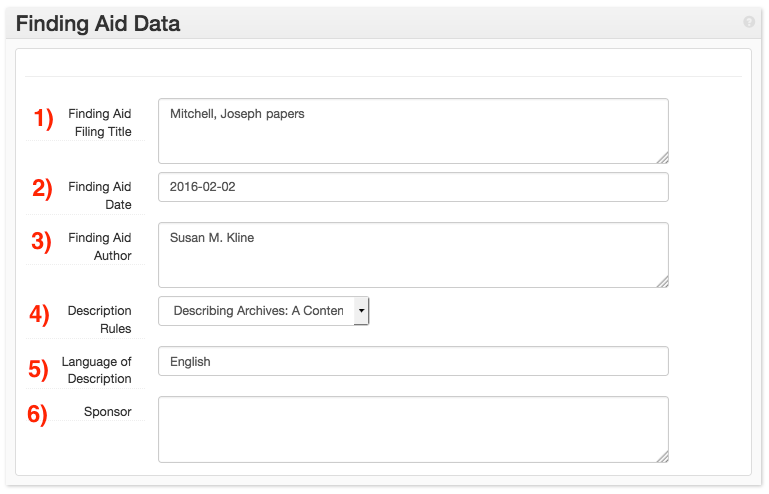
Finding Aid Filing Title
Provide the name of the finding aid in Finding Aid Filing Title (field 1). If the finding aid title begins with a name, provide that name in indirect order (e.g. “Wolfe, Tom papers”). Otherwise, provide the name as-is (e.g. “St. Philip’s Church records”).
Finding Aid Date
This field is completed after the finding aid is published to the Archives Portal. The date of publication should be ended as YYYY-MM-DD in Finding Aid Date (field 2).
Finding Aid Author
Provide the name(s) of the original author(s) of the finding aid in Finding Aid Author (field 3). Do not provide the names of authors of revisions; provide that information in the Revision Statement instead.
Description Rules
Provide the rules used to formulate description in the Description Rules field (field 4). In all cases, this value will be DACS.
Language of Description
Provide the language used by the finding aid in Language of Description (field 5). In all cases, this value will be English.
Sponsor
Provide the sponsor of the collection, if necessary, in the Sponsor field (field 6). Use the language provided by the deed of gift or purchase agreement.
Revision Statement
The Revision Statement form allows for recording information about changes made to a finding aid. Do not create Revision Statement records when creating a finding aid for the first time. Only complete this field when describing additions or revisions to a collection. Provide the nature and extent of the revision (e.g. Boxes 7-10 processed by <name>Anne Archivist</name>).

Whenever a change, update, or addition is made to a previously processed finding aid, create a Revision Statement record. Sub-forms can be generated by clicking the Add Revision Statement button (button 1).
Record the date that the revision was completed in the Revision Date field (field 2). Use YYYY-MM-DD format to record the date.
Describe the nature of the revision in the Revision Description field (field 3). Include the name of all archivists involved in the revision in this field.